Every dog parent knows that magical moment when your furry friend’s tail starts wagging at the sight of a treat. Making homemade dog treats is more than just feeding your pup. It’s about showing love through natural treats that light up their world.
Jump to RecipeThese 3-ingredient peanut butter pumpkin dog treats are a game-changer. They’re easy to make and packed with nutrition. Your dog will love them, and you’ll feel great knowing they’re healthy.
Imagine turning three simple pantry items into a tasty reward that’s good for your dog. This recipe makes you the ultimate dog treat hero. You’ll create snacks that are both delicious and nutritious.
Why Make Homemade Dog Treats
Making homemade dog treats is a favorite hobby for many pet owners. It lets them control what their dogs eat. This way, they can ensure their pets get the best nutrition.
Homemade treats offer more than just a tasty snack. They are a great choice for your dog’s health.
Benefits of Natural Ingredients
Natural ingredients in dog treats are very good for your pet. But, many commercial treats have:
- Artificial preservatives
- Unnecessary fillers
- Low-quality protein sources
By making treats at home, you avoid these bad things. Your dog gets healthy, nutritious snacks.
Cost-Effective Alternative to Store-Bought Treats
Making treats at home can save money. It’s a way to cut down on pet food costs. Here’s a comparison:
| Treat Type | Average Cost Per Serving |
|---|---|
| Store-Bought Treats | $0.50 – $1.00 |
| Homemade Treats | $0.10 – $0.25 |
Control Over Ingredients Quality
When you make treats yourself, you have total control. You can pick the best ingredients and check their freshness. You can also make recipes that fit your dog’s diet perfectly.
Your dog’s health starts with what goes into their treats – and nobody knows their needs better than you.

Essential Ingredients for Pumpkin Dog Treats
Making tasty and healthy dog treats starts with picking the right ingredients. Your furry friend deserves snacks that are good for them and make them happy. Let’s look at the main ingredients that make these pumpkin dog treats a hit.
Pumpkin puree is a nutritional gem for dogs. It adds flavor and health benefits to homemade treats. It’s full of fiber and nutrients that help your dog’s digestion and taste great. Always choose 100% pure pumpkin without added sugars or spices.
- Dog-safe peanut butter provides protein and healthy fats
- Whole wheat flour offers additional fiber and nutrients
- Pumpkin supports digestive health and weight management
Choosing the right peanut butter is key for your treats. Always check the label to make sure it doesn’t have xylitol, which is bad for dogs. Look for natural peanut butter with just peanuts and maybe a bit of salt.
Whole wheat flour is a great base for your dog treats. It has complex carbs and more nutrients than refined flours. If your dog can’t have wheat, try coconut or oat flour instead.
By picking these three simple ingredients, you can make treats that are yummy and good for your dog.
Safety Considerations When Using Peanut Butter
When making homemade dog treats, safety is key. Your pet’s health depends on the ingredients you choose and how you handle them.
Avoiding Xylitol in Peanut Butter
Xylitol is a sweetener that’s toxic to dogs. To keep your dog safe, follow these important steps:
- Always read ingredient labels carefully
- Check for xylitol in the first few ingredients
- Select natural, unsweetened peanut butter brands
- Stick to pure peanut butter with minimal additives
Choosing the Right Pumpkin Puree
Choosing the right pumpkin is crucial. Pure pumpkin puree is best, not pumpkin pie filling. Pie filling has added sugars and spices.
- Look for 100% pure pumpkin in cans
- Avoid pumpkin pie mix
- Check for no added sugars or preservatives
Proper Ingredient Storage
Storing ingredients properly is vital. It keeps your dog’s treats fresh and safe. Here’s how to store them:
- Store peanut butter in a cool, dark place
- Refrigerate opened peanut butter
- Keep pumpkin puree sealed and refrigerated after opening
- Check expiration dates regularly
By following these steps, you’ll make sure your homemade dog treats are tasty and safe for your pet.
3 Ingredient Peanut Butter Pumpkin Dog Treats
Making tasty peanut butter pumpkin treats for your dog is easy. This recipe is simple and healthy. You only need three ingredients to make treats your dog will love.
Here’s what you’ll need:
- 1 cup pure pumpkin puree (not pumpkin pie filling)
- 1/2 cup natural peanut butter (xylitol-free)
- 2 1/2 cups whole wheat flour
These treats are easy to make because each ingredient is important. Pumpkin adds fiber and nutrients. Peanut butter brings protein and flavor. Whole wheat flour makes the treats just right.
These treats are healthy and yummy. They’re easy to make, perfect for busy dog owners. You can make them without spending hours cooking.
Pro tip: Use the best ingredients for your dog’s health. Your dog will feel the love in every bite of these homemade treats!
Step-by-Step Mixing Instructions
Making homemade dog treats is a fun and rewarding task. It’s all about the mixing to get treats that are both tasty and healthy. With the right steps, you can make treats that your dog will adore.
Professional bakers know that mixing ingredients right is key. It’s all about being systematic and paying attention to every detail. This ensures your treats turn out perfectly every time.
Preparing Your Workspace
First, get your kitchen ready. Make sure it’s clean and organized. Have all your ingredients and tools ready to go. You’ll need:
- Large mixing bowl
- Measuring cups
- Wooden spoon or silicone spatula
- Parchment paper
- Clean work surface
Combining Wet and Dry Ingredients
Start by mixing your wet ingredients in a bowl. Stir peanut butter and pumpkin puree until smooth and well-blended. Then, slowly add your dry ingredients. Keep mixing until the dough is just right.
Achieving the Right Dough Consistency
The dough’s consistency is very important. You want it to pull away from the bowl’s sides. If it’s too sticky, add a bit of flour. If it’s too dry, add more pumpkin puree.
Now, knead the dough gently. This ensures all ingredients are mixed well. The dough should be firm but still soft, like cookie dough.
Baking Tips and Techniques
Baking homemade dog treats needs precision and care. When making peanut butter pumpkin dog treats, temperature and timing are key. Preheat your oven to 350°F and start making treats your dog will love.
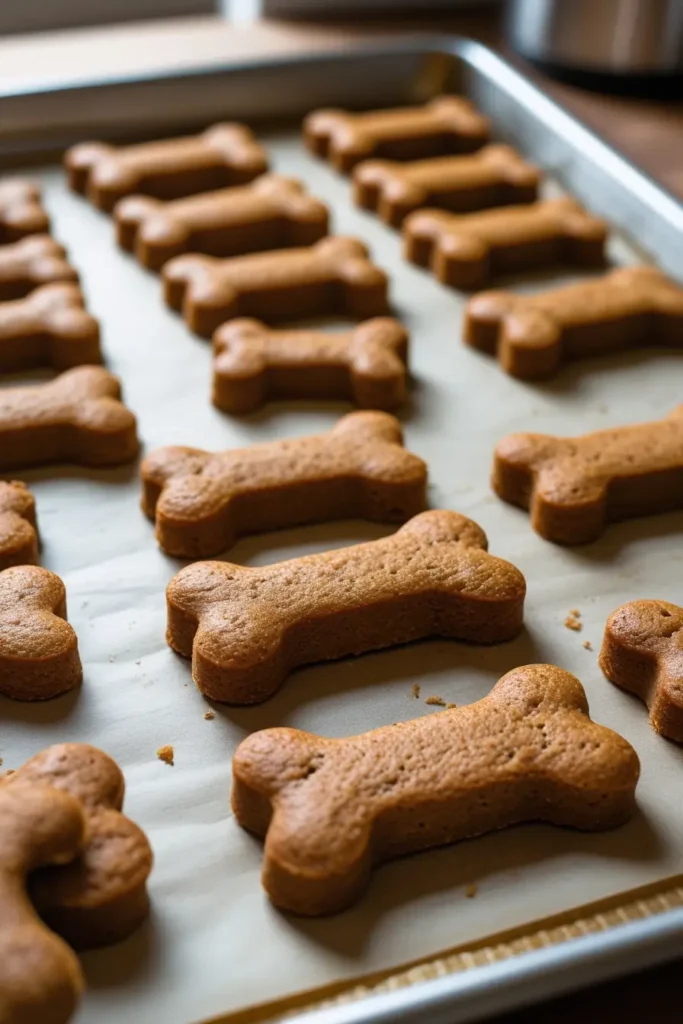
Dog treat shapes can make baking more fun. Here are some shaping ideas:
- Use bone-shaped cookie cutters for classic dog treat designs
- Roll the dough into small balls for bite-sized treats
- Create simple square or rectangular shapes using a knife
Remember these important tips when baking dog treats:
- Bake small to medium treats for 20 minutes
- Add up to 5 extra minutes for larger treat sizes
- Look for golden brown edges as a sign of doneness
The right treat texture is crucial. Make sure your dough is just right – not too dry or too wet. This will give treats that are crisp outside and chewy inside, perfect for dogs.
Pro tip: Let the treats cool completely on a wire rack before serving. This makes them crunchy, which dogs love.
Storage and Shelf Life
Keeping dog treats fresh is key. Your homemade peanut butter pumpkin dog treats need special care. This ensures they stay tasty and safe for your pet.
There are many ways to store dog treats. The goal is to keep them away from moisture and air. These elements can make the treats go bad fast.
Refrigeration Guidelines
Putting treats in the fridge can make them last longer. Here are some tips:
- Use an airtight container to prevent moisture
- Store treats in a single layer to maintain texture
- Keep refrigerated treats for up to two weeks
Freezing Methods for Longer Storage
Freezing treats is a great way to keep them fresh for a long time. The right method can make your treats last for months.
| Storage Method | Duration | Best Practices |
|---|---|---|
| Refrigerator | 2 weeks | Airtight container, single layer |
| Freezer | 3-4 months | Individually wrapped, sealed bag |
To freeze treats, wrap each one in wax paper or plastic wrap. Then, put them in a freezer-safe bag. This stops them from sticking together and lets you thaw only what you need.
To thaw frozen treats, take them out of the freezer. Let them sit at room temperature for about 30 minutes. Always check for freezer burn or odd smells before giving them to your dog.
Serving Sizes and Treat Frequency
It’s important to control dog treat portions for a balanced diet. Your dog’s health depends on how many treats they get. Homemade treats are good, but they shouldn’t replace regular meals.
Vets suggest these guidelines for healthy treat frequency:
- Limit treats to 10% of your dog’s daily calories
- Give 1-2 small treats a day
- Adjust the amount based on your dog’s size and weight
Dogs of different sizes need different amounts of treats. A small Chihuahua needs fewer than a big Labrador. Think about your dog’s needs and how active they are when deciding on treats.
Keep an eye on your dog’s weight and health. Treats should be a reward, not the main food. Talking to your vet can help you figure out how to add treats to your dog’s diet.
Watch for signs of too many treats, like weight gain or less energy. A good diet has the right food, exercise, and a few treats.
Variations and Substitutions
Creativity in the kitchen can make your gluten-free dog treats special. Every dog is different, and knowing how to swap ingredients is key. This way, you can make treats that your dog will love and stay healthy.
Trying out different ingredients lets you tailor treats to your dog’s tastes and needs. This ensures your homemade snacks are tasty and good for them.
Alternative Flour Options
For gluten-free dog treats, you can use many flours instead of wheat:
- Oat flour: A gentle, nutrient-rich option perfect for sensitive dogs
- Coconut flour: High in fiber and protein, ideal for weight management
- Almond flour: Rich in healthy fats and protein
- Chickpea flour: Provides additional protein and digestive benefits
Seasonal Ingredient Swaps
Seasonal dog treats make mealtime fun with fresh ingredients. Here are some ideas:
- Replace pumpkin with sweet potato during autumn months
- Use mashed banana instead of pumpkin for a different flavor profile
- Swap peanut butter with unsweetened yogurt for protein variety
- Incorporate pureed carrots for additional nutrients during winter
Always introduce new ingredients slowly and watch for any allergic reactions. Your dog’s health and happiness should always come first when making treats.
Conclusion
Making homemade dog treats is more than just saving money. It’s about giving your dog a tasty, healthy snack made with love. You’ll know exactly what’s in their treats, keeping them safe from bad additives.
Preparing these treats shows how much you care for your dog. Each batch is a chance to show love with good ingredients. It’s easy, fun, and lets you tailor treats to your dog’s likes and needs.
Try new things to make treat time fun. Change ingredients or mix up flavors. Homemade treats are about sharing joy and connection with your pet. They’ll love the effort and love you put into every bite.
Begin making homemade treats today and see your dog’s tail wag. These snacks are a tasty way to show your love and care for your furry family member.
FAQ
Are these peanut butter pumpkin dog treats safe for all dogs?
These treats are usually safe, but always check with your vet first. This is especially true if your dog has food allergies or health issues. Make sure to read the ingredient labels and introduce new treats slowly.
How long can I store these homemade dog treats?
Store them in an airtight container in the fridge for 5-7 days. Freezing them can extend their shelf life to 3 months. Always check for spoilage before giving them to your dog.
Can I use regular flour instead of whole wheat flour?
Whole wheat flour is best for its health benefits, but you can use oat flour or coconut flour for dogs with gluten issues. These alternatives might change the treat’s texture a bit.
How many treats can I give my dog per day?
Treats should not exceed 10% of your dog’s daily calories. The number depends on your dog’s size, weight, and diet. Small dogs might get 1-2 treats, while bigger dogs can have 2-3.
What type of peanut butter is safe for dogs?
Use natural peanut butter without xylitol, which is harmful to dogs. Choose brands with just peanuts and maybe a bit of salt. Avoid peanut butter with added sugars or artificial sweeteners.
Can I make these treats if my dog has food allergies?
You can make these treats by using different flours like rice or coconut. Always check with your vet to ensure the ingredients are safe for your dog’s allergies.
How do I know if the treats are baked correctly?
The treats should be firm, golden brown, and break easily. They should have a crisp outside and a consistent inside texture.
Are pumpkin treats beneficial for dogs?
Pumpkin is great for dogs, offering fiber, vitamins, and digestive support. It helps with both constipation and diarrhea and is low in calories, making it a healthy treat option.
Can puppies eat these treats?
While the ingredients are safe, puppies have sensitive stomachs. Introduce new treats slowly and in small amounts. Always talk to your vet about the best treats for puppies.
How can I make the treats more exciting for my dog?
Try using different cookie cutters, varying treat sizes, or adding small amounts of dog-safe ingredients like chopped carrots or parsley. This adds variety and extra nutrition.

Easy 3-Ingredient Peanut Butter Pumpkin Dog Treats
Course: Homemade Dog TreatsCuisine: HomemadeDifficulty: EasyAbout 20–24 small treats
servings10
minutes20
minutes35
minutesIngredients
1 cup pure pumpkin puree (NOT pumpkin pie filling)
1/2 cup natural peanut butter (xylitol-free)
2 1/2 cups whole wheat flour
Directions
- Preheat your oven to 350°F (175°C). Line a baking sheet with parchment paper.
- In a large mixing bowl, combine the pumpkin puree and peanut butter until smooth.
- Gradually stir in the whole wheat flour until a soft dough forms.
- Roll out the dough on a floured surface to about 1/4-inch thickness.
- Use cookie cutters (bone shapes or other fun styles) or cut into squares/strips.
- Place treats on the prepared baking sheet and bake for 20–25 minutes, or until the edges are golden brown.
- Let the treats cool completely on a wire rack before serving.
- Storage Tips:
Store in an airtight container in the fridge for up to 2 weeks.
For longer shelf life, freeze in a sealed bag for up to 3–4 months.
Pro Tips
- Avoid peanut butter with xylitol, which is toxic to dogs.
Use pure canned pumpkin with no added sugar or spices.
If dough is sticky, add a little extra flour; if too dry, add a spoon of pumpkin.
Let treats cool fully for a crunchy finish your pup will love!