Palworld’s vast and captivating world deserves to be shared with friends. Whether you’re looking to join an existing server or host your own, this guide has you covered.
Palworld Dedicated Servers: How to Join
Joining a dedicated server is a straightforward process that allows you to explore the vast world of Palworld with friends. Follow these simple steps:
- Gather the Information: To join a dedicated server, you’ll need the host’s IP address. This is a unique identifier for their server on the internet. Once you have it, head to Palworld’s Multiplayer menu.
- Connect and Play: Select “Join Multiplayer Game” and enter the host’s IP address in the designated field. Click “Connect,” and if the server allows it, you’ll be transported to their dedicated world!

- Password Protection: Some dedicated servers have passwords for added security. If prompted, enter the password provided by the host to gain access.
Palworld Dedicated Servers: How to Create
Steam Users: The Easy Route
For Steam users, the journey’s a straightforward one:
- Download the “Palworld Dedicated Server” tool from Steam. Remember to check the “Tools” box during installation, otherwise it won’t show up.
- Launch the server. A black CMD screen will appear. This signifies your server is active!
- Invite your friends. Head back to Steam’s Palworld and choose “Join Multiplayer Game.” Share your IP address with your trusted crew.
Pro Tip: Sharing your IP address is sensitive! Only share it with people you trust. Additionally, ensure your firewall allows access and configure port forwarding through your router.
Beyond Steam: For the Tech-Savvy Adventurers
Want complete control over your Palworld experience? This method requires technical know-how, but unlocks endless possibilities.
- Download SteamCMD. This official Valve tool lets you manage dedicated servers. Extract it to a separate folder.
- Create a “start.bat” file. Right-click inside the folder, create a text document, and rename it “start.bat” (removing the .txt extension). Paste the following command and save:
steamcmd.exe +login anonymous +app_update 2394010 +quit
- Run the “start.bat” file. Wait for it to configure and generate server files.
- Run the “start.bat” file again. This time, it will launch the server.
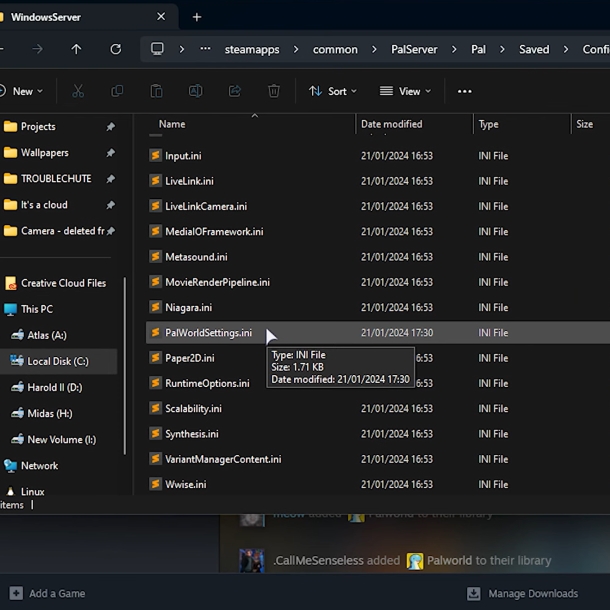
- Configure the server. Open the “DefaultPalworldSettings.ini” file in Steamapps>Common>PalServer. Copy everything from the fourth line onwards. Paste it into “PalWorldSettings.ini” located in Pal\Saved\Config\WindowsServer. Modify details like server name, player limit, or password as desired.
- Close everything and run the “start.bat” file once more.
- Join your server. Launch Palworld, choose “Join Multiplayer Game,” and click on your server’s IP address at the bottom.
Remember to configure firewall exceptions and router port forwarding for smooth connectivity.
Palworld Dedicated Servers: How to Update
Follow these step-by-step instructions to keep your Palworld server current and take advantage of the newest features:
- Access your server’s control panel and select the Palworld server to update.
- Pause the server to prevent conflicts during the update and quickly perform a backup for added security.
- Find the Steam update icon in the control panel and trigger it. This launches the updater, downloading and installing the latest Palworld server files.
- Close the game and ensure no lingering background processes using Task Manager.
- Restart the game to complete the update.
With these steps and a little tech savviness, you’ll be hosting epic Palworld adventures with friends in no time! So gather your crew, choose your path, and get ready to conquer the world, together.
Related: