The beloved Lost Riches event is back in Genshin Impact Version 4.3, bringing with it a treasure trove of fun and rewards. Whether you’re a seasoned adventurer or a new face in Teyvat, this guide will help you navigate the event and claim your loot.
Genshin Impact 4.3 Lost Riches Event Overview
Situated in the picturesque Fontaine, the “Lost Riches” event, part of Version 4.3, unfolds its treasure-laden narrative from January 2, 2024, to January 15, 2024.
Each day, six distinct treasure areas will unlock, beckoning players to embark on a journey of discovery.
Treasure Area Schedule:
- Treasure Area 1: West Slopes of Mont Automnequi (January 2, 2024)
- Treasure Area 2: Salacia Plains (January 3, 2024)
- Treasure Areas 3-6: Unveiled consecutively from January 4 to January 7, 2024
This time, your trusty Seelie companion needs a little “energy boost” to sniff out the treasure. Collect purple particles scattered across the designated area, and once the Seelie is fully charged, it’ll lead you straight to the buried loot. But be warned, some challenges await along the way!
How to Start
Before you set sail, ensure you meet the following requirements:
- Adventure Rank 20 or higher
- Unlocked any Statue of The Seven in Fontaine
To begin your treasure hunt, you’ll need to be an Adventure Rank 20 and have unlocked any Statue of The Seven in Fontaine.
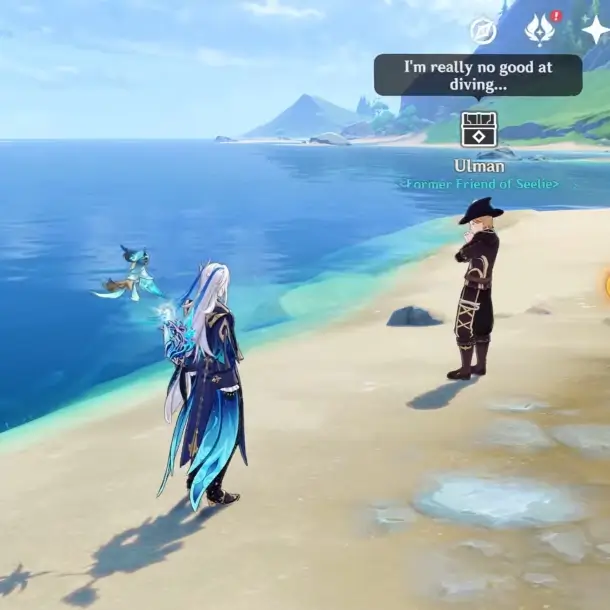
To kick off your adventure, seek out Ulman, a treasure seeker extraordinaire, northwest of the Court of Fontaine. He’ll guide you through the “Treasures Under the Sea” quest and entrust you with a magical Treasure Map, revealing a new treasure area each day for a total of six enchanting locales.

Now, let’s guide you through the intricacies of each treasure area.
Lost Riches Treasure Area 1 Walkthrough
The first treasure area is located between Poisson and the West Slopes of Mont Automnequi, southeast of Fontaine in the Belleau Region. Follow these steps to collect the treasures:
- Collect the first energy emission hidden between two bushes.
- Head downhill to find the second energy emission near a tent and some trees.
- Locate the third energy emission inside a small hut elevated on a platform.
- After collecting the first three energy emissions, a Treasure Challenge will be unlocked. Complete the challenge to collect 14 particles in 120 seconds. Once completed, the Seelie will guide you to the first treasure chest.
- Find the fourth energy emission perched on a ledge behind some tombstones.
- Use a hydro ring to reach the fifth energy emission hidden beneath a ledge among bushes.
- Collect the sixth energy emission above a tent between two houses, guarded by Treasure Hoarders.
- Complete the combat Treasure Challenge after collecting all six energy emissions to unveil the location of the second treasure chest.
Lost Riches Treasure Area 2 Walkthrough
The second treasure area is located underwater, southeast of Salacia Plain and directly above Elton Trench. Follow these steps to uncover the treasure:
- Collect three energy emissions trapped in a bubble. To do this, complete a challenge to burst the bubble and remove the obstruction.
- The first energy emission is on top of a broken pillar, triggering a Pufferfriut Challenge.
- The second energy emission is further underwater, near a sunken ship, also triggering a Pufferfriut Challenge.
- Be careful not to hit the Dirty Fruits during the challenges, as it will reset your progress.
- The third energy emission is nestled near some seaweeds and will initiate an underwater combat challenge.
- After completing all three challenges, head to the dig site, located in an opening, and unearth the Precious Chest.
Lost Riches Treasure Area 3 Walkthrough
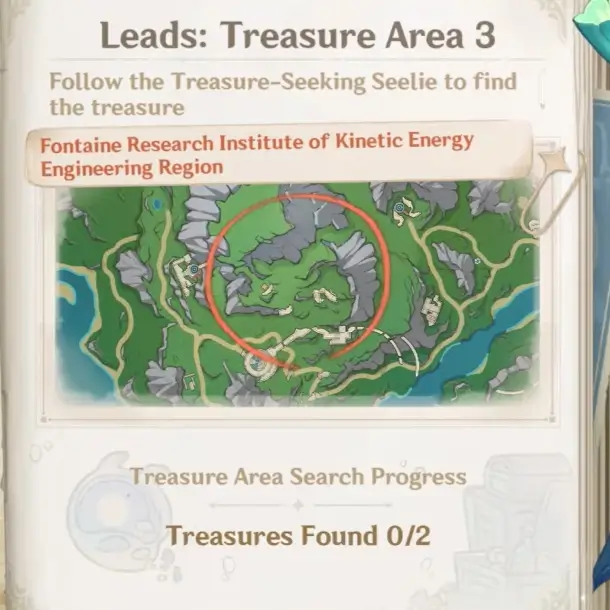
In this area, you will need to find a total of six energy emissions. Follow this walkthrough to uncover the treasures:

- Head northeast from the teleport waypoint to locate the first energy emission. It can be found on top of a broken pillar.
- After absorbing the first energy emission, enter the Hydro portal to be transported to a new location. Once you arrive, search near the bushes to find the second energy emission.
- From your current location, head east to find the third energy emission. It is situated atop a broken tree. Interacting with it will activate the Treasure-Seeking Seelie, which will mark the location of the chest on the minimap. Follow the map and complete the challenge to obtain the first treasure in Genshin Impact 4.3 Lost Riches Treasure Area 3.
- Proceed north from your previous location to discover the fourth energy emission. It can be found above a similar broken tree.
- Head east from your previous location and search behind the bushes to find the fifth energy emission.
- The final energy emission can be found atop a broken cart near the Shrine of Depths. Interact with it to vitalize the Treasure-Seeking Seelie once again and mark the location of the second chest.
Lost Riches Treasure Area 4 Walkthrough
Your mission in this area is to assist the Treasure-Seeking Seelie in this region by activating three energy emissions cleverly concealed within Mist Bubbles.
- Upon teleporting to the underwater waypoint, the first energy emission awaits. Engage in a Pufferfruit challenge, bursting Mist Bubbles to release the energy. Remember, target only the yellow Pufferfruits, avoiding the brown Dirty Fruits that sap the Seelie’s power.
- Journey eastward for the second energy orb. Here, the Pufferfruit challenge takes a twist, with some fruits in constant motion. Utilize the Xenochromatic Jellyfish’s ability to blast away the Pufferfruits without accidentally touching the Dirty Fruits.

- Swim northward to find the final energy emission. This time, face a combat challenge against Fontemer Aberrants. Use Xenochromatic creatures’ abilities to your advantage and vanquish these foes, fully revitalizing the Treasure-Seeking Seelie.
With all three energy emissions activated, the Seelie will guide you to the treasure’s location. Dive into the marked spot and unearth a Precious Chest brimming with riches: 20 Primogems, 90 Ancient Iron Coins, and a hefty Mora reward.
Rewards
Every chest you unearth rewards you with Ancient Iron Coins, the event currency. Exchange these coins in the event shop for:
- Primogems
- Mora
- Hero’s Wit
- Mystic Enhancement Ore
- Mini Seelie
- Brilliance
- Dayflower
- Rose
- Viola
- Moss
- Curcuma
That concludes the Lost Riches event guide in Genshin Impact 4.3. Explore, solve challenges, and reap the rewards hidden in these treasure-filled areas. May your adventures be prosperous!
Related:


